Sunday, 5 January 2014

Packing and sorting the roof rack

Well I have taken full advantage of the last weekend free for a month this weekend.

It started on Thursday after work with me going through all the things which I had left in the house and gathering them together. I negotiated (very easily indeed) which of the shared pictures are going with me and there were no disagreements at all over this. I also took the large box of delicate decorations and split it apart into many little boxes, packing them and labeling them clearly as such. I also emptied the last cupboard and went digging under my bed to find anything which I had mislaid.

I didn't get a picture of the pile of stuff in the middle room to take, but Friday morning I was up early and putting it all into Thomas as I would be going to Blackpool straight from work.

Friday passed and I was in Thomas and legging it towards Blackpool with the truck full, the evening ahead full of driving. As soon as I arrived at Blackpool I was running to hook the electric across to the storage unit, unload the trailer (which I had left the previous weekend) and unload everything from in Thomas. I then hitched the trailer up and was heading back to my house within thirty minutes.

I was only collecting a couple of things with this trip however I needed the trailer because the table top had to get to Blackpool for storage. I have firmly decided to not take it with me this trip. I also was collecting my TV and this was unhooked and placed on the back seat of Thomas, with the table top laid down in the trailer. One issue is that the feet (which I observed as slightly bent last weekend) were completely broken; I used a bungie to tie it up on the way to my house but replaced this with a zip tie for the trip back.

The journey back to Blackpool was pretty easy and it stopped raining half way there which allowed the wind to dry the table so it was pretty dry when I arrived. About half a mile away from the studio I heard a dragging sound and stopped to check; yep, the zip tie had broken and the leg had been trailing on the ground for an unknown period of time. It is now completely useless but I was able to hook it back up with the bungie and get back to the studio. I will need to get a wrench and remove these before the big journey.

So about 9:30 I got back to the studio and had a good go at reversing the trailer up to the entrance of the studio however the position of the cars made it too difficult for me; I was pretty happy with my efforts despite failing to get it fully done. A customer was on hand to advise me and Dan on how to best apply the bubble wrap to the TV and, this done successfully, we carried it to the storage.

A pretty sleepless night ensued with the storms blowing the shutter and making a racket however when I woke the storm had broken and it was a clear and lovely day. I had set myself the task today of working out how I could get both the roof boxes on top of Julian however I needed Dan to be there to pass them up and he wasn't due until the afternoon.

The pile of whisky
The pile of whisky
So I decided "I know, I'll clear the final things out of storage at the studio and start packing Julian" and thus I began dragging the trolley with my boxes of whisky on it across the carpark. I have six large boxes full, and a couple of loose bottles which have arrived since I packed it first, at the studio (not counting the bottles still at home) and they piled up on the blue pallet.

The safe box
The safe box
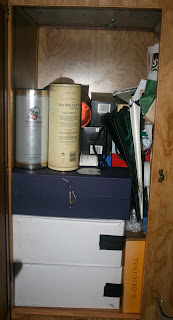
This done I started looking inside Julian to work out where I could put it all. My plan with Julian (as previously discussed) is to put things in the back where the shower and toilet is, but keep the body as empty as I can. Above the toilet I saw a cupboard and inside there was a lockable box probably used as a safe by previous users. This was very easy to remove and the space in this cupboard was just perfect.

The whisky, packed in
It took about half an hour for me to drag each box in and unload them while being careful about stacking them to prevent any chance of breakage but the volume I had to fill ended up being even too big for all my (non investment) bottles in. The remaining volume I stuffed with the fragile boxes brought from the house the evening before, and finally used my gig t shirt collection and a few egg boxes, to completely fill the area and prevent all movement. The funny/concerning thing is that after this, as I was moving around in Julian, I could hear the liquid sloshing in the bottles. No clinking though.

The shower cubicle packing space
My investment bottles I decided to leave inside their clear boxes and, usefully, one of them fitted perfectly in the shower tray and the other wedged in between the edge of the tray and the sink. I got all the other fragile boxes, and a few other bits of odds and sods like my pictures and packed them tightly around the edges, to make sure nothing can move. I have also been able to take some of the DVDs and stack them on shelves which would otherwise have been wasted space. All in all I think I could possibly drive Julian as he is without anything being at risk however I will be putting bungies across to stop things sliding. I had to remove the door for the back room to get the boxes in so I will have to take this with me to remount it when I arrive. I also want to get a padlock on the cupboard door, and maybe even screw wood across the back door so it is not accessible and is secure.

I had a bit more time so I pulled together all my small empty boxes and split the large DVD box into each of these, to make packing it easier.

Shortly after this Dan arrived and I clambered up on top of Julian again and he passed the roof boxes up to me. It didn't take long to realise that neither of them would fit in the new positions I was hoping for. After a short discussion I decided to remove some of the struts on the roof rack which were in the way of putting the long narrow roof box on the roof, and that I would put the other box back where it was originally.

My effort with the hacksaw
I started with the hacksaw but that effort lasted about five minutes, and after I only managed about a 2mm deep groove I gave up and Dan kindly picked me an angle grinder up while he was out in town.

Much easier with the angle grinder
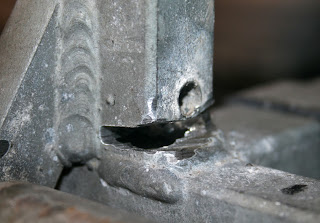
Having the correct tools for the job makes such a difference and within a few minutes of cranking the grinder onto the metal I was slicing through it. The weld was really hard to grind through so I didn't waste time on it and moved onto the other strut on the side I was attacking and this was cut through with ease.

Angle grinder, and chopped strut
I then twisted and bent the metal and the weld snapped after a bit of effort, leaving me with only two more pieces to cut through.

No more upright
No more upright
Another ten minutes and the whole job was completed, I threw the removed metal off the roof with a clang (which I didn't hear that well as the noise of the grinder is amazing, along with the beautiful sparks which fly everywhere makes this job one which overwhelms the senses) and shut the unit up.

What a beautiful Blackpool sunset
After leaving the studio I went along the front towards Pets at Home to get a carry case for Sassy as she is into the vet on Monday, and the sunset was so amazing. I was lucky to stop at the side of the road and get this snap out of my window. Wow, I love Blackpool sometimes.

So the tarpaulin and generator is due to arrive on Monday however I have no plans to be back at the studio for four weeks now. When I get back there I'll only have five weeks until I leave. I may head over one evening this week to play with the generator, and see how big it is, so I can start to consider the packing of it, but I'm not sure.

Tuesday, 31 December 2013

First Practice Pack

Last night after I blogged I headed back over to the unit to sort out the CDs and I was able to empty a couple of boxes of them into the CD racks which are scattered throughout Julian (including, now, between the front seats) and I have also picked out a really good selection into the front CD rack. Jumping ahead of myself, I did put another box of CDs into the trailer which, on next pack, I may keep out so I can try and keep all my CDs accessible for the journey.

Anyway, this morning I woke and went straight out to the storage unit to crack on with painting the roof. It had been raining hard since the middle of yesterday afternoon and the unit has a couple of holes in the roof; a lot of water was dripping through and puddling on the floor but because of the pallets none of my stuff had got wet. One of the drip-points is actually above Julian but it doesn't look like anything has come through inside.

The first couple of brush-strokes of the second coat
As explained yesterday the shop had sold out of white waterproofing paint and so I have had to buy four tins of black. I used just over two of the white tins and so bought four black to allow a slightly thicker coat this time round. Also, as the paint is black, I will be sure to cover ever millimeter as every missed bit will show up.

Second coat fully applied
It took me a couple of hours to do the whole job and I did end up opening the last tin before I finished. Also this black paint is far more pungent and I started getting quite light headed, so much so that I had to open the shutter to get fresh air in. Fortunately by this time the rain wasn't as bad and the wind had dropped almost to nothing.

As yesterday as soon as I finished painting I was in Julian and frying up my oh so very tasty Bacon and Egg barm; once again a really tasty breakfast (even if I did slightly overdo the egg today). No pictures again; you've all seen the cooker and me using it to make breakfast.

So I ate this and then went straight to the practice pack.

The first thing to put in was the top and back for the desk; this slid in very easily and then the shelves from the bookshelf fitted down the side to make a flat surface. This was achieved quickly but then, for some reason, I stopped and just stood for about five or ten minutes looking at things, trying to work out where to go next.

Starting to pack; two amps, a guitar and some boxes
I broke my indecision by going back to the studio to get my vintage Marshall cab out of the store room (which took a bit of effort as it was buried at the back) and then, when slid this to the back left to the trailer. The other guitar amp I am taking fitted nicely next to it and I was off on a roll.

The desk units fitted in perfectly
From this point on I cleared down the pallet with my books and DVDs on it, keeping the level of the boxes at about the level of the sides of the trailer. Once I had cleared these down I turned to the two drawer boxes for the desk. For this attempt I have laid these on their sides and this seems like a good idea.

Just how cleanly they fit...
The gap between two of the ribs on the sides of the trailer is just wide enough that the foot-ridge fits between them and this snug fit really encourages me that nothing will move in transit.

Loose stuff in the drawers
Obviously the drawers could be voids of wasted space, but also I don't want to put anything heavy which could damage them, and so I have put a load of the loose soft and less important stuff inside each drawer. The things I've put in here are not things I really need to take but I would like to have them with me.

The finished trailer (with bent leg on right)
So, there it is; I have managed to get everything I wanted to onto the trailer without it going above the sides however it is REALLY heavy; I tried to move it but only succeeded in stressing the legs and when I spotted this I stopped the attempt. I think that I will have to remove a fair few things from the trailer before hooking it up to the back of Thomas the day before I go; this is another task to do that weekend that I was hoping to avoid but there will be no easy way of hooking up the trailer when it is fully laden.

My next tasks are to work out how the roof boxes will fit; can I even get them both on the top of Julian? I really hope so. I am also ordering the tarpaulin so will hopefully have that delivered and can work out how to fix it best; I am thinking of getting a load of bungies, or maybe some other form of clips, and will be looking for one which has a large number of eyelets all round the edges. Thinking of which, the generator hasn't arrived yet either; I may need to chase this.

Ten weeks to go; and many of my weekends are busy so I really need to keep cracking on with this stuff.

Happy New Year :)

Monday, 30 December 2013

Working on Julian

So another day of working on Julian, though I haven't got quite as much done today as I hoped as I'm having to wait for things to dry etc etc.

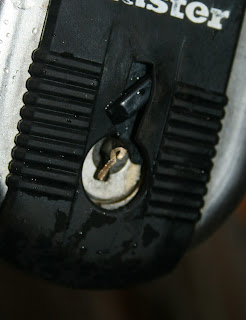
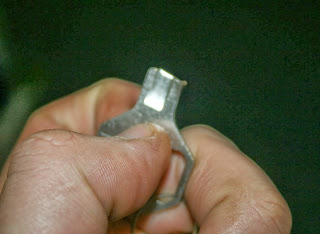
The half of the key left in the padlock
First thing this morning I was up and across to try and sort out the padlock which I had snapped the key off in. Wow that was a badly put together sentence. Sorry.

Anyway, I grabbed the WD40 and a set of needlenose pliers and set to trying to extract the broken part of the key which was still stuck inside the lock. I didn't squirt WD40 at first as I was aware this would make gripping the sliver of metal much more difficult.

Got it!
Got it!
With a few wiggles and slips I got the needlenose firmly attached and managed to slide the piece out; it doesn't look like the actual lock is damaged but I will confirm this later when I use my (only) spare key to shut and lock the gate for the night. I have squirted a load of WD40 into the lock now, however, to try and free up the mechanism which was stiff and caused the breakage in the first place.

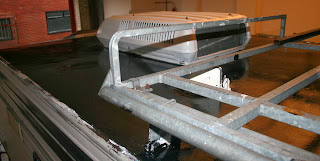
Painting the roof
Painting the roof
From this quick win I headed inside and straight up the ladder to start painting the roof on Julian. I had two tins of white paint and hoped that would be enough for the first coat. After an hour or two of painting which included me getting right on top of the roof on the roof-rack and clambering around in many awkward contortions I ran out of paint with only a very small amount left to do. Typical, but not a big issue as I'd also forgotten to bring any overalls and so was struggling to avoid getting paint on my clothes.

I headed over to B and Q (again) but found that they had only one more tin of the paint I was using in white, and the rest black. Needs must; my second coat will be black which means I will have to mask off the edges to make it as neat as I possibly can.

Working man at work
Working man at work
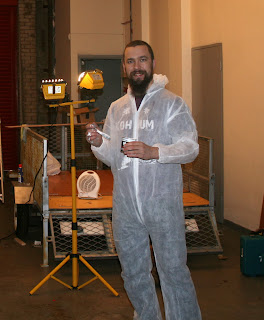
Anyway, that is for tomorrow. I bought my overalls and put them on; they were large but I only just fit into them and in the hour or so I was using them I managed to split the crotch; I would hate to see how someone larger than I fared in it; ridiculous.

And actually doing the painting
I was back up the ladder and finishing off the edges which I had left before, using the one tin of white which they had had left; good job that was there or I would not have managed a full first coat.

I will leave this to dry and tomorrow morning will be back up there putting the second coat of Matt Black on; I haven't spotted any other obvious places where the water could have been leaking in while I have been doing this, and obviously have been over the entire roof, so I'm hopeful that I have fixed the leakage. Inside the dehumidifier had managed to completely fill itself so I emptied it and have left it running again over night.

I have no pictures of this next but while I was out I bought bacon, eggs and barms and as soon as I finished the painting I was inside Julian and frying up one of my excellent bacon and egg breakfasts. I am not sure what it is about Julian and the cooker in him but they taste so much better on there than anywhere else. Outstanding.

Toilet CD rack... yeah... weird, huh
While I have been fettling around moving things in Julian I noticed that there was a CD rack in the back next to the shower. Now I don't know about you but to me that seems like quite a strange place to put a CD rack. I also have been thinking about the journey and realised that I will probably just use CDs in Julian (as the radio in him doesn't have a 3mm jack and I don't want to replace it). These two things came together in a brain wave. Why don't I move the rack from in the shower to between the front seats.

No sooner said than done.

New home
New home
Another issue which I have been trying to work out how to fix is whoever fitted the CD player, didn't. It is so loose and basically falling out of its slot (if you look closely at the picture above you can see on the right that it is falling out.

Wood wedging CD player still
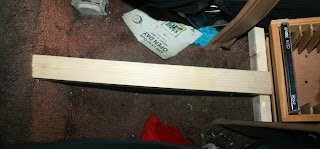
I had another brain wave. Why not use the CD rack to wedge a bit of wood in to support the player and stop it falling out. I had the perfect length piece of waste wood (see why I hate throwing things away?) and very quickly managed to get this in place.

Wedging the other end
Next I had to work out how to hold the rack still so it wouldn't slip (and would be solid to hold the CD player in place) so I went back to my store of spare wood and found a length which just needed trimming slightly and I could wedge in at the other end and everything would be great. The piece which I trimmed off of THIS bit of wood then became useful to go across below to support and help make the whole thing rigid.

And fitted, with some CDs in. Excellent.
All in all I am very pleased with this as I can now have LOADS of CDs really easily to hand, not falling around in the footwell like they were before, and I have managed to secure the player so it is easy to load and use the radio now.

I was going to do a practice load of the trailer today however the sealant which I put on yesterday is still slightly tacky to the touch so I am going to do this tomorrow after my second coat of paint.

Really feel like I'm getting some good progress now.

Sunday, 29 December 2013

Christmas time...

Unless you didn't notice, it's just been Christmas.

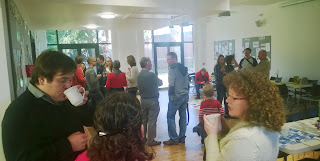
My family at the gathering
Yeah, I don't pay much attention to it either but it is a notable occasion to give me an excuse to write about it as a "for the last time" blog series post. The more important thing that happened "for the last time" before I leave is I had the family gathering of my mother's side.

Three people we all miss very much
I spent most of the day talking to people about this whole adventure and it was really nice to be able to explain to people who care about me, and who are all so excited for me. I know a fair few of them read this (or at least they said they did) so hi there, thanks for reading family and please come visit me when I get out there!

The day was good; we had great food, good conversation and laughs, a nice walk and the location was lovely where I was able to go outside and sit in the sun on a bench and enjoy the peace and quiet a couple of times.

A bad picture of the sun dial
One thing I really enjoyed was the church tower had a sun dial instead of a normal clock; I haven't seen one before. I did notice that it didn't take into account of daylight saving, however.

So I was only down in Birmingham for 24 hours including the do, and then straight back up to Blackpool this afternoon to get on with everything I want to get done.

As last time the first thing I did was to drag the power extension cables from the studio over to the storage unit and get the dehumidifier running again. I also took a little electric heater over to put inside Julian and get running. I was able to get the power all the way across with only one join outside and this I have put in a plastic bag, and also positioned underneath Thomas. Hopefully (though it isn't as stormy so maybe there won't be any rain tonight) I won't have a fuse problem this time. I have left the dehumidifier running overnight, but more of that later.

I also checked the state of the battery and it was down to the lowest level; this having just been sat there with nothing plugged in at all; it could be a defective battery I suppose but I'm not sure. Is there a way of detecting the drain on a battery? Anyway, I plugged the hookup in to put charge back in the battery.

I've sealed the gaps in the boards
I have come to the studio to focus on my overtime work however there was one thing I really wanted to get done this evening which was to use the silicon to seal between the boards which I put on the trailer last time. This did not take much time at all as my technique is now polished.

After finishing this task I locked the unit and left the heater and dehumidifier going while I cracked on with some software work. After a few hours I decided to turn the heater off and lock the gate for the night. A quick check of the roof shows me that I have nearly got rid of all the water inside which is really good. The battery was showing full as well, which is good; once again I'll pay attention to the charge and see how quickly it gets to zero.

This is where I made a really big mistake. I was trying to unlock the padlock on the gate (I lock it onto the gate when it is open, so I can take the keys with me) and it has recently been getting slightly stiff to turn. With it being so pitch black, and me being a bit cold and in a hurry, I struggled to turn the key and suddenly I thought "ooh it is turning" and so kept putting effort in and it wasn't until it was completely done did I realise I had actually twisted the key off inside the lock!

One snapped key
One snapped key
Not a good thing.

I have managed to lift the gate and wedge it shut so it looks locked but this will have to be looked at tomorrow morning. I do have a spare key so if i can get the snapped bit out of the padlock all is not lost; if I can't though I may have to get a chain and another padlock as I wouldn't be able to lock the gate any more.

Male Pattern Baldness, maybe
Finally, I spotted over the weekend that I am going bald HAHAHAHA.

Friday, 27 December 2013

Two Days of Hard Work

I am just back from the studio after having had a fantastically productive couple of days sorting things out in the storage unit. It has really come into his own and proven what a sensible idea it was to take it on as the weather has broken (as you will all know) however I have been inside, sheltered warm and dry and with the shutter down and the arc lights on I have been able to just keep going through all the dramatic wind and rain.

Anyway, that is getting ahead of myself.

I have been trying to do overtime for work this holiday and it has been going a bit badly; first of all I left my hard drive at the studio when I was there at the weekend which meant I struggled to get the code to a place where I could access it on my laptop. Then, when I came to start the work I realised that I hadn't got all the resources I needed. For this reason I went past the office yesterday on my way over to the studio and got the resources which I needed.

Dehumidifier in Julian
Upon arriving at the studio my first task was to pull the power over to the unit and set the dehumidifier running. My plan was to leave this running continually throughout both days to get as much of the moisture out of the ceiling as I possibly could.

Yep, cutting wood here
With this done I got to work measuring the plywood boards for lining the bottom of the trailer. It turned out that I had bought exactly the correct amount of wood; I was able to cut one of the boards in two and make use of both halves to complete the tessellation.

The boards, laid out to prove it
With the boards cut to shape I started the task of painting them with PVA to seal and waterproof them. This took bloody AGES but I just got myself into a routine and cracked on with it and after a couple of hours it was all done.

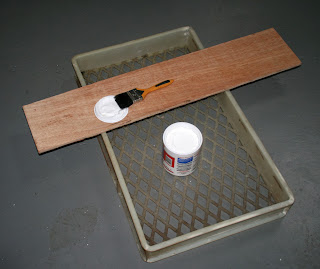
PVA, plastic tray and brush with wood
I pulled some of the plastic trays out of the plastic wrapped stack and laid each board on them, thus keeping the glue covered wood off the floor. Once I had done all of one side, and the edges, I went back to the beginning and, turning them over, sealed the other side.

All the boards completed and drying
This task completed I left them overnight to dry.

At this point I almost stopped and vegetated however I snapped myself out of the lethargy of post-food and decided to have a go at applying the sealant to at least part of Julian's roof, even if just to see how easily it went on and whether my plan would work.

Ready to work on the roof
I set the arc lights pointing upwards and pulled the ladder round the side and the illumination was absolutely perfect to work on the roof. This alone is great to know however I did far more than just check how well I could see up there.

When I bought the sealant I also bought an applicator gun so I unpacked all my kit, including camera, and went up the ladder. After much effort squeezing the handle of the applicator I got the silicon to very near the end of the nozzle and then "crack" the handle bent in half!

The metal bent when I squeezed
Whoops.

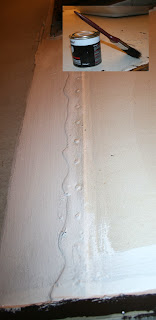
Fortunately I knew that we had another of these in the studio so I dashed over, grabbed that, and it was of much more sturdy construction and pretty quickly I was applying and spreading the silicon along the edge of the roof where the gap was obvious. The following pictures illustrate the technique which I had worked out before I even started. First of all I put a thick trail of the silicon along the target area, large blobs of it. Next I took the scraper and smoothed along the line, making the join continuous and filling in any holes and gaps which, if left, would make the whole exercise pointless.

Blobby squirt of silicon
Smoothing with the scraper
Smoothing with the scraper 
The smoothed silicon
Once I got started I just didn't stop and I went right the way round the whole edge of the roof, squirting and spreading and squirting and spreading until I had sealed everything. What a great success, I really thought I wouldn't achieve this much in one afternoon.

The drips still in the cabin
I decided not to sleep in Julian as I left the dehumidifier running through the night however the gales woke me in the night and about 4am I went downstairs and saw that the fuse had tripped out on the extension cable taking power to the other unit. I unplugged it, reset the fuse, and headed back to bed.

In the morning I was pleased that I was able to reconnect the power and it did not trip out again; the dehumidifier was on the job once again.

I bought all the fixings
I went to B and Q and bought them out (literally) of the straight joint strips, and a load of bolts with nuts, with which to affix the boards onto the trailer.

Measuring and Drilling the holes
I laid the first board top left of the trailer and for the first of many times headed under the trailer on my back and marked up where I wanted the bolt holes to be drilled. I then pulled the board onto the saw horses and drilled the first four holes. Next I took one of the plates and one bolt and worked out where the other hole needed to go, per fixing.

Measuring out the other hole
The board, fully drilled, went back into it's place on the trailer bed and I set about fixing it. This was accomplished by first of all putting one of the flat joint strips on the top of the board and then pushing the bolts through so the protruded through underneath the trailer. Next I went back underneath the trailer and used another flat joint strip and the nuts and tightened them up as much as I could finger tight.

The top strip in place
The top strip in place 
And the bottom strip attached
It felt like I was crawling around on the floor under that trailer for hours (maybe because I was) but eventually I completed the task and all the boards were fixed into place.

The finished base on the trailer
I had made a mistake on the last board, however, as you always do as you come towards the end of a task it's important to keep focused. Because the bottom left board is rotated compared to all the other ones (as you can see from the picture above) I drilled the secondary holes in the wrong place; vertically above rather than horizontally across.

Filled the hole with silicon
After a little thinking I realised that I had that silicon gunk which I could use to fill these holes and so, as I was packing down ready to head off, I grab the gun and this worked really well. As I was driving home I realised I should have carried on and used the silicon to fill the gaps between the boards; I will have to do this first thing when I get back to the unit as I had hoped to start the process of packing the trailer up next time.

The water I collected
The last thing I did before leaving was unplug everything and check the state of the dehumidifier. I was still seeing some moisture in the gap in the ceiling but much less than earlier and you can see from the picture just how much had been drawn out of the vehicle. I will be plugging this back in and running it as much as I possibly can whenever I am over there, to keep this process going.

So there you have it, I got loads done. I have another list for the next time I get over there though. I bought some multi-purpose waterproofing paint which I am going to apply across the whole of the roof and as mentioned earlier I also want to pack the trailer.

It is really becoming very real now and my fears are starting to build; have I got enough money (probably not) will I cope with the isolation (I think so) is this really a good idea (yes I think so) and all these thoughts are spinning round in my head. I think it'll only get worse up until that moment when I drive away from the studio for the last time.