Tuesday 31 December 2013

First Practice Pack

Last night after I blogged I headed back over to the unit to sort out the CDs and I was able to empty a couple of boxes of them into the CD racks which are scattered throughout Julian (including, now, between the front seats) and I have also picked out a really good selection into the front CD rack. Jumping ahead of myself, I did put another box of CDs into the trailer which, on next pack, I may keep out so I can try and keep all my CDs accessible for the journey.

Anyway, this morning I woke and went straight out to the storage unit to crack on with painting the roof. It had been raining hard since the middle of yesterday afternoon and the unit has a couple of holes in the roof; a lot of water was dripping through and puddling on the floor but because of the pallets none of my stuff had got wet. One of the drip-points is actually above Julian but it doesn't look like anything has come through inside.

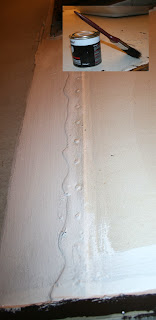
The first couple of brush-strokes of the second coat
As explained yesterday the shop had sold out of white waterproofing paint and so I have had to buy four tins of black. I used just over two of the white tins and so bought four black to allow a slightly thicker coat this time round. Also, as the paint is black, I will be sure to cover ever millimeter as every missed bit will show up.

Second coat fully applied
It took me a couple of hours to do the whole job and I did end up opening the last tin before I finished. Also this black paint is far more pungent and I started getting quite light headed, so much so that I had to open the shutter to get fresh air in. Fortunately by this time the rain wasn't as bad and the wind had dropped almost to nothing.

As yesterday as soon as I finished painting I was in Julian and frying up my oh so very tasty Bacon and Egg barm; once again a really tasty breakfast (even if I did slightly overdo the egg today). No pictures again; you've all seen the cooker and me using it to make breakfast.

So I ate this and then went straight to the practice pack.

The first thing to put in was the top and back for the desk; this slid in very easily and then the shelves from the bookshelf fitted down the side to make a flat surface. This was achieved quickly but then, for some reason, I stopped and just stood for about five or ten minutes looking at things, trying to work out where to go next.

Starting to pack; two amps, a guitar and some boxes
I broke my indecision by going back to the studio to get my vintage Marshall cab out of the store room (which took a bit of effort as it was buried at the back) and then, when slid this to the back left to the trailer. The other guitar amp I am taking fitted nicely next to it and I was off on a roll.

The desk units fitted in perfectly
From this point on I cleared down the pallet with my books and DVDs on it, keeping the level of the boxes at about the level of the sides of the trailer. Once I had cleared these down I turned to the two drawer boxes for the desk. For this attempt I have laid these on their sides and this seems like a good idea.

Just how cleanly they fit...
The gap between two of the ribs on the sides of the trailer is just wide enough that the foot-ridge fits between them and this snug fit really encourages me that nothing will move in transit.

Loose stuff in the drawers
Obviously the drawers could be voids of wasted space, but also I don't want to put anything heavy which could damage them, and so I have put a load of the loose soft and less important stuff inside each drawer. The things I've put in here are not things I really need to take but I would like to have them with me.

The finished trailer (with bent leg on right)
So, there it is; I have managed to get everything I wanted to onto the trailer without it going above the sides however it is REALLY heavy; I tried to move it but only succeeded in stressing the legs and when I spotted this I stopped the attempt. I think that I will have to remove a fair few things from the trailer before hooking it up to the back of Thomas the day before I go; this is another task to do that weekend that I was hoping to avoid but there will be no easy way of hooking up the trailer when it is fully laden.

My next tasks are to work out how the roof boxes will fit; can I even get them both on the top of Julian? I really hope so. I am also ordering the tarpaulin so will hopefully have that delivered and can work out how to fix it best; I am thinking of getting a load of bungies, or maybe some other form of clips, and will be looking for one which has a large number of eyelets all round the edges. Thinking of which, the generator hasn't arrived yet either; I may need to chase this.

Ten weeks to go; and many of my weekends are busy so I really need to keep cracking on with this stuff.

Happy New Year :)

Monday 30 December 2013

Working on Julian

So another day of working on Julian, though I haven't got quite as much done today as I hoped as I'm having to wait for things to dry etc etc.

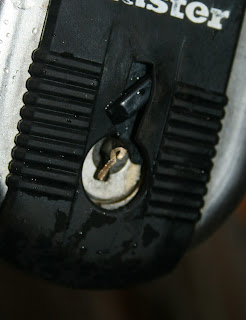
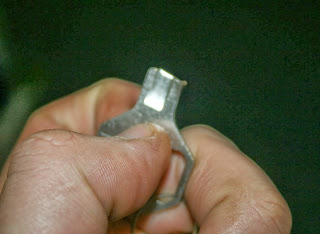
The half of the key left in the padlock
First thing this morning I was up and across to try and sort out the padlock which I had snapped the key off in. Wow that was a badly put together sentence. Sorry.

Anyway, I grabbed the WD40 and a set of needlenose pliers and set to trying to extract the broken part of the key which was still stuck inside the lock. I didn't squirt WD40 at first as I was aware this would make gripping the sliver of metal much more difficult.

Got it!
Got it!
With a few wiggles and slips I got the needlenose firmly attached and managed to slide the piece out; it doesn't look like the actual lock is damaged but I will confirm this later when I use my (only) spare key to shut and lock the gate for the night. I have squirted a load of WD40 into the lock now, however, to try and free up the mechanism which was stiff and caused the breakage in the first place.

Painting the roof
Painting the roof
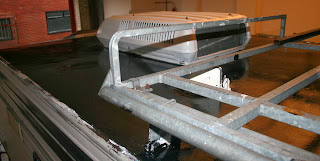
From this quick win I headed inside and straight up the ladder to start painting the roof on Julian. I had two tins of white paint and hoped that would be enough for the first coat. After an hour or two of painting which included me getting right on top of the roof on the roof-rack and clambering around in many awkward contortions I ran out of paint with only a very small amount left to do. Typical, but not a big issue as I'd also forgotten to bring any overalls and so was struggling to avoid getting paint on my clothes.

I headed over to B and Q (again) but found that they had only one more tin of the paint I was using in white, and the rest black. Needs must; my second coat will be black which means I will have to mask off the edges to make it as neat as I possibly can.

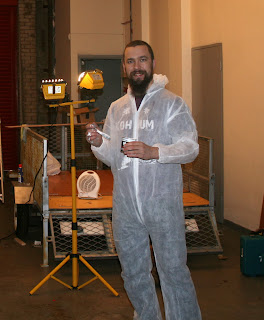
Working man at work
Working man at work
Anyway, that is for tomorrow. I bought my overalls and put them on; they were large but I only just fit into them and in the hour or so I was using them I managed to split the crotch; I would hate to see how someone larger than I fared in it; ridiculous.

And actually doing the painting
I was back up the ladder and finishing off the edges which I had left before, using the one tin of white which they had had left; good job that was there or I would not have managed a full first coat.

I will leave this to dry and tomorrow morning will be back up there putting the second coat of Matt Black on; I haven't spotted any other obvious places where the water could have been leaking in while I have been doing this, and obviously have been over the entire roof, so I'm hopeful that I have fixed the leakage. Inside the dehumidifier had managed to completely fill itself so I emptied it and have left it running again over night.

I have no pictures of this next but while I was out I bought bacon, eggs and barms and as soon as I finished the painting I was inside Julian and frying up one of my excellent bacon and egg breakfasts. I am not sure what it is about Julian and the cooker in him but they taste so much better on there than anywhere else. Outstanding.

Toilet CD rack... yeah... weird, huh
While I have been fettling around moving things in Julian I noticed that there was a CD rack in the back next to the shower. Now I don't know about you but to me that seems like quite a strange place to put a CD rack. I also have been thinking about the journey and realised that I will probably just use CDs in Julian (as the radio in him doesn't have a 3mm jack and I don't want to replace it). These two things came together in a brain wave. Why don't I move the rack from in the shower to between the front seats.

No sooner said than done.

New home
New home
Another issue which I have been trying to work out how to fix is whoever fitted the CD player, didn't. It is so loose and basically falling out of its slot (if you look closely at the picture above you can see on the right that it is falling out.

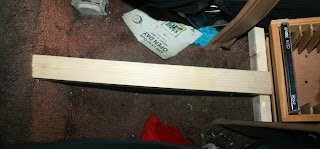
Wood wedging CD player still
I had another brain wave. Why not use the CD rack to wedge a bit of wood in to support the player and stop it falling out. I had the perfect length piece of waste wood (see why I hate throwing things away?) and very quickly managed to get this in place.

Wedging the other end
Next I had to work out how to hold the rack still so it wouldn't slip (and would be solid to hold the CD player in place) so I went back to my store of spare wood and found a length which just needed trimming slightly and I could wedge in at the other end and everything would be great. The piece which I trimmed off of THIS bit of wood then became useful to go across below to support and help make the whole thing rigid.

And fitted, with some CDs in. Excellent.
All in all I am very pleased with this as I can now have LOADS of CDs really easily to hand, not falling around in the footwell like they were before, and I have managed to secure the player so it is easy to load and use the radio now.

I was going to do a practice load of the trailer today however the sealant which I put on yesterday is still slightly tacky to the touch so I am going to do this tomorrow after my second coat of paint.

Really feel like I'm getting some good progress now.

Sunday 29 December 2013

Christmas time...

Unless you didn't notice, it's just been Christmas.

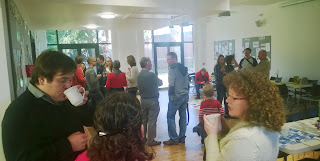
My family at the gathering
Yeah, I don't pay much attention to it either but it is a notable occasion to give me an excuse to write about it as a "for the last time" blog series post. The more important thing that happened "for the last time" before I leave is I had the family gathering of my mother's side.

Three people we all miss very much
I spent most of the day talking to people about this whole adventure and it was really nice to be able to explain to people who care about me, and who are all so excited for me. I know a fair few of them read this (or at least they said they did) so hi there, thanks for reading family and please come visit me when I get out there!

The day was good; we had great food, good conversation and laughs, a nice walk and the location was lovely where I was able to go outside and sit in the sun on a bench and enjoy the peace and quiet a couple of times.

A bad picture of the sun dial
One thing I really enjoyed was the church tower had a sun dial instead of a normal clock; I haven't seen one before. I did notice that it didn't take into account of daylight saving, however.

So I was only down in Birmingham for 24 hours including the do, and then straight back up to Blackpool this afternoon to get on with everything I want to get done.

As last time the first thing I did was to drag the power extension cables from the studio over to the storage unit and get the dehumidifier running again. I also took a little electric heater over to put inside Julian and get running. I was able to get the power all the way across with only one join outside and this I have put in a plastic bag, and also positioned underneath Thomas. Hopefully (though it isn't as stormy so maybe there won't be any rain tonight) I won't have a fuse problem this time. I have left the dehumidifier running overnight, but more of that later.

I also checked the state of the battery and it was down to the lowest level; this having just been sat there with nothing plugged in at all; it could be a defective battery I suppose but I'm not sure. Is there a way of detecting the drain on a battery? Anyway, I plugged the hookup in to put charge back in the battery.

I've sealed the gaps in the boards
I have come to the studio to focus on my overtime work however there was one thing I really wanted to get done this evening which was to use the silicon to seal between the boards which I put on the trailer last time. This did not take much time at all as my technique is now polished.

After finishing this task I locked the unit and left the heater and dehumidifier going while I cracked on with some software work. After a few hours I decided to turn the heater off and lock the gate for the night. A quick check of the roof shows me that I have nearly got rid of all the water inside which is really good. The battery was showing full as well, which is good; once again I'll pay attention to the charge and see how quickly it gets to zero.

This is where I made a really big mistake. I was trying to unlock the padlock on the gate (I lock it onto the gate when it is open, so I can take the keys with me) and it has recently been getting slightly stiff to turn. With it being so pitch black, and me being a bit cold and in a hurry, I struggled to turn the key and suddenly I thought "ooh it is turning" and so kept putting effort in and it wasn't until it was completely done did I realise I had actually twisted the key off inside the lock!

One snapped key
One snapped key
Not a good thing.

I have managed to lift the gate and wedge it shut so it looks locked but this will have to be looked at tomorrow morning. I do have a spare key so if i can get the snapped bit out of the padlock all is not lost; if I can't though I may have to get a chain and another padlock as I wouldn't be able to lock the gate any more.

Male Pattern Baldness, maybe
Finally, I spotted over the weekend that I am going bald HAHAHAHA.

Friday 27 December 2013

Two Days of Hard Work

I am just back from the studio after having had a fantastically productive couple of days sorting things out in the storage unit. It has really come into his own and proven what a sensible idea it was to take it on as the weather has broken (as you will all know) however I have been inside, sheltered warm and dry and with the shutter down and the arc lights on I have been able to just keep going through all the dramatic wind and rain.

Anyway, that is getting ahead of myself.

I have been trying to do overtime for work this holiday and it has been going a bit badly; first of all I left my hard drive at the studio when I was there at the weekend which meant I struggled to get the code to a place where I could access it on my laptop. Then, when I came to start the work I realised that I hadn't got all the resources I needed. For this reason I went past the office yesterday on my way over to the studio and got the resources which I needed.

Dehumidifier in Julian
Upon arriving at the studio my first task was to pull the power over to the unit and set the dehumidifier running. My plan was to leave this running continually throughout both days to get as much of the moisture out of the ceiling as I possibly could.

Yep, cutting wood here
With this done I got to work measuring the plywood boards for lining the bottom of the trailer. It turned out that I had bought exactly the correct amount of wood; I was able to cut one of the boards in two and make use of both halves to complete the tessellation.

The boards, laid out to prove it
With the boards cut to shape I started the task of painting them with PVA to seal and waterproof them. This took bloody AGES but I just got myself into a routine and cracked on with it and after a couple of hours it was all done.

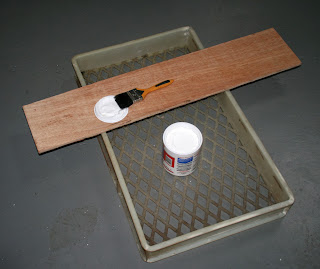
PVA, plastic tray and brush with wood
I pulled some of the plastic trays out of the plastic wrapped stack and laid each board on them, thus keeping the glue covered wood off the floor. Once I had done all of one side, and the edges, I went back to the beginning and, turning them over, sealed the other side.

All the boards completed and drying
This task completed I left them overnight to dry.

At this point I almost stopped and vegetated however I snapped myself out of the lethargy of post-food and decided to have a go at applying the sealant to at least part of Julian's roof, even if just to see how easily it went on and whether my plan would work.

Ready to work on the roof
I set the arc lights pointing upwards and pulled the ladder round the side and the illumination was absolutely perfect to work on the roof. This alone is great to know however I did far more than just check how well I could see up there.

When I bought the sealant I also bought an applicator gun so I unpacked all my kit, including camera, and went up the ladder. After much effort squeezing the handle of the applicator I got the silicon to very near the end of the nozzle and then "crack" the handle bent in half!

The metal bent when I squeezed
Whoops.

Fortunately I knew that we had another of these in the studio so I dashed over, grabbed that, and it was of much more sturdy construction and pretty quickly I was applying and spreading the silicon along the edge of the roof where the gap was obvious. The following pictures illustrate the technique which I had worked out before I even started. First of all I put a thick trail of the silicon along the target area, large blobs of it. Next I took the scraper and smoothed along the line, making the join continuous and filling in any holes and gaps which, if left, would make the whole exercise pointless.

Blobby squirt of silicon
Smoothing with the scraper
Smoothing with the scraper 
The smoothed silicon
Once I got started I just didn't stop and I went right the way round the whole edge of the roof, squirting and spreading and squirting and spreading until I had sealed everything. What a great success, I really thought I wouldn't achieve this much in one afternoon.

The drips still in the cabin
I decided not to sleep in Julian as I left the dehumidifier running through the night however the gales woke me in the night and about 4am I went downstairs and saw that the fuse had tripped out on the extension cable taking power to the other unit. I unplugged it, reset the fuse, and headed back to bed.

In the morning I was pleased that I was able to reconnect the power and it did not trip out again; the dehumidifier was on the job once again.

I bought all the fixings
I went to B and Q and bought them out (literally) of the straight joint strips, and a load of bolts with nuts, with which to affix the boards onto the trailer.

Measuring and Drilling the holes
I laid the first board top left of the trailer and for the first of many times headed under the trailer on my back and marked up where I wanted the bolt holes to be drilled. I then pulled the board onto the saw horses and drilled the first four holes. Next I took one of the plates and one bolt and worked out where the other hole needed to go, per fixing.

Measuring out the other hole
The board, fully drilled, went back into it's place on the trailer bed and I set about fixing it. This was accomplished by first of all putting one of the flat joint strips on the top of the board and then pushing the bolts through so the protruded through underneath the trailer. Next I went back underneath the trailer and used another flat joint strip and the nuts and tightened them up as much as I could finger tight.

The top strip in place
The top strip in place 
And the bottom strip attached
It felt like I was crawling around on the floor under that trailer for hours (maybe because I was) but eventually I completed the task and all the boards were fixed into place.

The finished base on the trailer
I had made a mistake on the last board, however, as you always do as you come towards the end of a task it's important to keep focused. Because the bottom left board is rotated compared to all the other ones (as you can see from the picture above) I drilled the secondary holes in the wrong place; vertically above rather than horizontally across.

Filled the hole with silicon
After a little thinking I realised that I had that silicon gunk which I could use to fill these holes and so, as I was packing down ready to head off, I grab the gun and this worked really well. As I was driving home I realised I should have carried on and used the silicon to fill the gaps between the boards; I will have to do this first thing when I get back to the unit as I had hoped to start the process of packing the trailer up next time.

The water I collected
The last thing I did before leaving was unplug everything and check the state of the dehumidifier. I was still seeing some moisture in the gap in the ceiling but much less than earlier and you can see from the picture just how much had been drawn out of the vehicle. I will be plugging this back in and running it as much as I possibly can whenever I am over there, to keep this process going.

So there you have it, I got loads done. I have another list for the next time I get over there though. I bought some multi-purpose waterproofing paint which I am going to apply across the whole of the roof and as mentioned earlier I also want to pack the trailer.

It is really becoming very real now and my fears are starting to build; have I got enough money (probably not) will I cope with the isolation (I think so) is this really a good idea (yes I think so) and all these thoughts are spinning round in my head. I think it'll only get worse up until that moment when I drive away from the studio for the last time.

Monday 23 December 2013

Getting Julian Housed

What a profitable and productive weekend that was; it really feels like I'm on that downward slope towards the leaving day.

I didn't bother coming to Blackpool on the Friday night as I wanted to have a little lie in on Saturday and I knew I was staying up til late Sunday after the annual Christmas meal at my business partner's parents house so it was around lunch time when I arrived and went past the garage to find out if Thomas was ready; he was, and the keys were taped in their usual place however I just grabbed the keys and legged it in Julian to the studio as I had more MeekAid mixing to do. This was done without a hitch and I set off walking and collected Thomas.

Basically, a new engine
I have not yet had to pay the bill as Chris hasn't totted it all up yet, but he left me a hand written list of tasks which had been completed and I must admit I'm a little scared of how much it will all cost. Rather have him fixed than scrap and buy a new one which could have any number of other problems, that is my attitude.

So I'm back in Thomas and this means I can put Julian away and solve the leakage issue which has been getting steadily worse and worse.

The first task of the weekend was to tidy the unit; I had piled all my stuff up on one side of the unit and it was becoming a little tangled and jumbled with other items being added to the pile. It also was in the way for when Julian and the trailer were going to be in the unit. My idea was to place pallets around the edges and back of the room (to keep my stuff off the floor as this unit also has some problems with leaks) and thus also divide my stuff into "furniture", "boxes", "gardening stuff" and "vinyls".

Toy stuffing. Yes, really...
First of all, I removed everything that wasn't mine from this half of the unit, dragging huge bags of toy-stuffing left over from years before when the unit had a cuddly toy factory in it. I also removed a large amount of waste wood, and dragged a pallet load of plastic trays out of the way.

With the space clear I was then able to arrange the pallets and move my stuff into a far more organised layout.
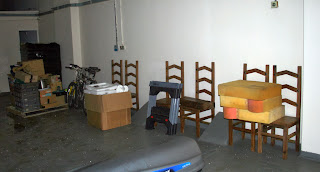
Right hand side of the unit
On the right wall I put my chairs and the table legs; I'm still questioning whether these should come with me and I may end up leaving them in storage at the studio, or even selling the lot. I have also put my packaging material here, and the saw-horse which I will be using in the next couple of days. Finally, my bikes are now stood up at the far end.

Back of the unit
Back of the unit
At the back of the unit (right to left) I have my boxes of books and cds, gardening equipment and then other gardening stuff like plant pots. The middle pallet has things I definitely want to take, the plant pots pallet will be used as packaging and space fillers to stop vibration, or will just be left behind.
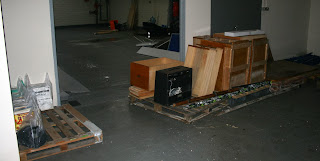
Left hand side of the unit
Finally in this little walk around, I have my furniture which I am definitely taking with me; the desk and a guitar amp and some flat pack shelves. I will be packing things inside the desk drawers etc so they will take up very little space, ultimately. Far left on this picture is the pallet with my vinyls on it.

The only things not in the unit now which I am taking is my TV and my whisky, and a couple of other small flat pack items which I am taking. Also, there are a few electrical items such as my amps and speakers. There is not much else left to bring over and soon I will have to start actually putting things into the trailer and truck to see exactly how it'll work. I still need to buy the tarpaulin and I'm not sure what size to get so that is waiting for this to be finished.

Having done this inside I climbed onto Julian to try and work out how to take the roof box off; he was too tall to get into the unit with it left on. Typically as I climbed up the gales started and it rained really heavily however I was able to work out that the straps which were wrapped around the box were there more for appearance sake so I removed them. In the wind I was not happy with trying to get the box down from that height on my own so I left it and, with help from Dan, it was removed very quickly on Sunday.

As always I slept very well in Julian, only disturbed by Rambo howling for his toilet, and then the swingers leaving from one of the other units in the early hours. On that, the final one didn't leave til about one pm! Hah!

My purchases
My purchases
The morning was blustery and I had a quick visit to B and Q to grab a load of stuff. I had worked out what I needed to buy to fix the Laycorn boxes together in pairs and I also knew exactly how much external ply I needed to line the trailer. Finally, while I was there, I picked up some gear to dry and clean the top of Julian, and a load of super heavy duty silicon sealant.

The Laycorn Boxes on their frame on the trailer
First task, though, was to sort the Laycorn boxes out. My plan is to have them stacked together in pairs, and join these together with bolts and big washers. Upon investigation I found that two of the boxes were already drilled for this so I was able to very quickly attach these two together.

Bolt, nut and washer
The other box needed drilling but this took very little time with the high powered driver and within short order I had the boxes firmly joined together.

Drilling the second pair
I did discover a slight fail after doing this; I had planned that the spare wheel from the trailer would be put inside one of these boxes however when I went to position it so I could drill through for the spare wheel bolt, I found that it didn't fit. I must have mis-measured or not read my handwriting correctly but never mind. The wheel can go behind one of the seats in Julian.

Julian being reversed in (not very well this attempt)
With all this done my next task was to get Julian into the unit so he could be out of the weather and I would be able to start resealing and making him finally ready for the long journey.

Julian in his new home
It took a few stop-starts and go arounds but with very little fuss I was able to reverse him easily into the space I had cleared next to the trailer. I can get the trailer in and out without moving Julian, and vica versa.

Loose sealant, and the gap in the roof edge
As soon as he was in I dragged the big ladder and went on top to find out exactly how much of a problem with missing sealant I had. It was pretty bad; almost the entire rim of the roof is missing it's sealant or, if not missing it, there are cracks and it is disintegrating. No wonder so much water had been coming into the living space.

I went over the whole roof with a cleaning mitt, wiping the excess water off and trying to clean it as best as I could. Then I went inside and used the towels I had bought to try and squeegie the water out of the ceiling and also mop up the puddles on the floor; yes it had got that bad last night. Finally I opened all the windows (leaving the fly screens in place) to allow it to air and dry out so I can hopefully avoid too bad a damp problem.

So there you are; Julian snug and happy in his new home, and I will be back again over the Christmas holidays to finish off all this prep work; I have to PVA the wood for the trailer, then cut the one outsize board to size and attach them to base. I also have to clean the roof of Julian properly and apply the silicon re-sealant. I need to work out also how to fit both roof boxes onto Julian and finally I need to practice with the packing.

One other little thing; I have bought myself a petrol generator which I have been considering for a while. It will come in really useful inside the unit (I can hook some arc-lights up to it and work with the shutter down which will keep me much warmer) and also when I arrive I will be less reliant on their being electricity. Finally it will certainly prove most useful to have when I am settled over there, what with the size of the land. I can drag it to where I'm needing it rather than having to have massive extension leads.

So there you are; busy busy busy.