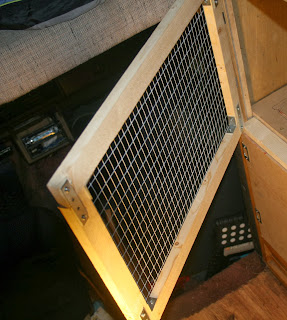
As soon as I got in I didn't even stop and gathered my tools and gear together to go straight out and crack on with the next step for the travel hutch; the top door which is a frame with mesh over it.
 |
| My sketch, measuring tools, and the cut lengths |
 |
| The frame, laid out before fixing together |
 |
| Pen mark to indicate location of screw |
Rather than juggle and struggle I marked with a pen where the holes would go on the long lengths and then screwed each right angle in the correct place on the long length. I then juggled and struggled to screw the shorter lengths to the right angles. It took a little bit of effort, and a lot of cursing (as always) but I got there in the end.
 |
| Reinforcing the corners |
The right angle joints made the job easier however they are not very rigid and therefore I chose to reinforce each corner as in this picture; with a long flat joint down across the two pieces of wood. With these in place the frame was square and was also did not flex any more which is exactly what you are aiming for.
I am aware I should really have used correct joinery skills here but I do not have the tools to do this; when I'm over there I hope to get them and try and improve these basic techniques and use more advanced ones over time.
Next task was to prepare the mesh which is going over the door. I measured this carefully and then got my snips and cut the large section down to size. This didn't take that long as I have just got some new snips to take with me, following on from the plastering course. The correct tools really do make a difference.
Next task was to prepare the mesh which is going over the door. I measured this carefully and then got my snips and cut the large section down to size. This didn't take that long as I have just got some new snips to take with me, following on from the plastering course. The correct tools really do make a difference.
 |
| U nail securing the mesh |
From one of my newest purchases to something I've had for years now; one of the first things I ever built was a large rat cage from a converted book shelf and I bought the U nails to do this. Now I was using them again for another animal-related construction and, with the help of needle nose pliers to hold the nails in place so I didn't hit my fingers, I very quickly had the mesh attached and secure. A big shout out to @ISambaman here for suggesting I avoid chicken wire and buy this style of mesh; this was very good advice and thank you.
 |
| Hinges attached |
I then started struggling to affix the hinges; I realised that I would have to attach them to the frame before the door so this was completed very quickly however trying to then attach the door defeated me. Fortunately I had help at hand and, with this help, the door attached in no time.
 |
| Swinging door..... |
The fit of the door is very tight; even slightly sticky however this isn't a bad thing and it is not so tight that opening it is a problem. I would rather it was that close to accurate, than wildly too small.
 |
| The front of the rabbit hutch |
And there it is. The hutch is not completely finished yet so you'll have at least one more boring update about this whole process. I have to build the ledge for the ramp to lower onto and I also have to stuff the gap with insulation and then put the top back panel on and nail the access panel closed. I will do this at the weekend when I drop Julian back at the studio and collect Thomas from the garage where he is still being an unwell boy right now.
 |
| She's a happy bunny, honest |
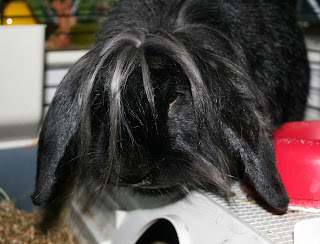
D'ya think Sassy'll look happier than this when she is in Bulgaria?
Them there 'U nails'?
ReplyDeleteThey're called staples!
:o)
That's not what they're called on t'packet :D
Delete*ignorant face*
He's correct (of course) I have them and they fire out of a staple gun. Great fun!
DeleteHe is :D I checked this weekend and meant to comment on to say :D
Deletethese ones are loose in a bag, though? :D they are ace