This weekend was the second part of the four day Beginners Plastering Course.
 |
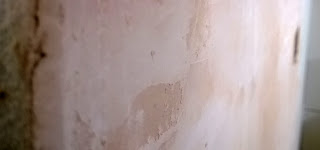
| The finish on my first attempt |
After having such a great time last weekend and feeling really confident and happy that this was something which I can definitely do I approached this weekend with some trepidation. Beginners luck could easily explain the results the previous weekend and also the speed and skill required would be increasing as the weekend went on.
If you remember we had skimmed the ceiling and half the big wall, after having spent the first day getting used to the environment and each other and just putting plasterboard onto a framework.
 |
| My applied plaster |
This weekend our task was to finish the big wall (joining this to the previously skimmed section), skim around the window (including the reveal), fill the hole we cut out for a plug socket, and then on the Sunday do an entire reskim of the whole plastered area: big wall, window wall and ceiling.
But more of that later.
 |
| His mrs washed them! |
Saturday morning arrived with a groan as the alarm went off at my usual midweek time but the motivation of "doing this for Bulgaria" helped me out of bed, into the kitchen and towards my first brew of the day. When I arrived (with my overalls still dirty) there was much amusement as my mate's wife had got hole of his and he was clean again.
Such is the humour of boys and workmen.
With much less ceremony than last week we were set to to mix up a load of plaster and on with plastering the wall around the window. While this was being mixed we each went round with a scraper and took the blobs and lumps of plaster dripped from the ceiling onto the wall off.
This week we were allowed to use the slightly nicer trowel however, as I stood on my step-up and took my trowel in hand loaded with plaster I suddenly realised that I had forgotten how to hold the thing! It took two or three attempts and then suddenly it all fell back into place and the plaster started going onto the wall nicely again.
 |
| First coat, troweled up, flattened |
First application, troweling up, second coat the troweling up again and flatten twice; plastering is a skill which depends upon speed of application and then being ready for when the next stages should be started. Just as it goes tacky is when you start troweling up. Flattening is slightly less time-dependent but you do NOT want to try it when the plaster has gone off too far or you will start pulling the plaster rather than smoothing it and then will have a large amount of sanding to do (which kind of defeats the object of plastering).
 |
| First around the window |
When the window wall was done I went on to plastering the reveal around the window. This was rather a fun challenge as the space was very limited and the plasterboard was actually quite bowed and therefore I had to pack the curve to ensure a flat application. I actually learned a LOT from this very small step in terms of how to build up plaster into a dip and how to press it down with the correct force to ensure it is flat.
 |
| The tiling course work and Len removing it |
While we were doing the plastering the tutors were going around knocking down the other walls, ripping tiles off, and generally tidying and clearing so the next course would have a space to start learning plastering. It was a sad sight to see such excellent tiling as this come smashing off the walls.
 |
| Soaked the join |
After lunch we had to plaster the rest of the large wall which included joining to the half we plastered last weekend. The technique here is simple; you must wet the old plaster thoroughly and then smooth the new plaster across onto the wet area really firmly. Once you have a smooth finish you can then scrape the overlapping new plaster off to ensure a smooth join.
 |
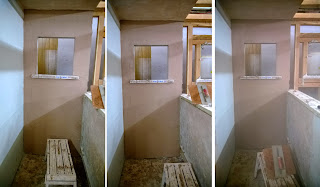
| The large wall all plastered |
The rest of the wall went on nicely and all of our techniques were now starting to come together and the results we were achieving now were making all of us feel a little better. I was still applying my first coat too thinly however my trowel angle for troweling off and flattening was much better.
The end of the day was us attempting to fill in the hole from the plug socket and learning about dot and dab which is a technique for sticking plasterboard to a wall to allow you to then easily plaster over a large area without having to render the wall.
Filling the hole ended up being a real pain - you measure a section of plasterboard slightly narrower, and slightly taller, than the gap and the push a nail through. You then load it up with plasterboard concrete and push it through the hole, while holding onto the nail. You then carefully push the nail through and hopefully the block will not fall out. This didn't quite work the first time but the second I loaded loads of the concrete stuff onto the board and held it for ages and it stayed.
So to home and much sadness watching the All Blacks beat England at rugby. Oh well.
 |
| Glue to be put on the old plaster |
The next morning was even tougher to drag myself out of bed for... plastering is very physical and I was starting to ache already. Not only that, but Sunday was the day when we were doing a full reskim of the ceiling and every wall - something which had taken all of the previous two days of plastering. The thing with this is plaster goes off very much quicker when it is skimmed over old plaster and so we would have to work much faster and more efficiently than we had all through the previous days of working.
 |
| Applying the glue with the roller |
The trick to plastering over old plaster is to provide a non-porous surface over the old plaster; we did this with a 3-1 mix of PVA glue and water. This was applied with a roller and then the new plaster went on a bit easier; not that it didn't go off much quicker, but we had time at least to put a load on before troweling up.
 |
| First reskim coat |
First the roof and by half way through I thought my arm was going to fall off. It was a case of mind over matter and just keep lifting and spreading and trying to get as good coverage as I possibly could while moving fast as it dried so quickly (as we were warned it would). By the time the first load was up I had to go straight to the beginning and trowel it off. This in comparison with about a five minute wait for the plastering onto fresh plasterboard. A minor victory on my second coat as I managed to put too much plaster on the ceiling where I had always til this point been too stingy with my application. This was solved by a heavy handed troweling off and the spare plaster went onto someone else's ceiling who had run out.
 |
| Roof and end all done |
After the first break we went onto the window wall using the same technique and then after lunch we did the entirety of the large wall which was a REALLY big challenge.
 |
| ... and the big wall |
I ran out of plaster and so had to start troweling off before I had finished the wall, as the applied plaster was going off so quickly. Fortunately Len, our excellent tutor, was hard at work making more mixes so we weren't short of plaster for long.
All in all this course has been excellent - I feel so much more comfortable to pick up a trowel and get involved in helping with the plastering in Bulgaria however I think I'll have to build myself some practice walls in my storage unit and keep my hand in as it is shocking how quickly you forget the techniques and how to hold the trowel etc.
 |
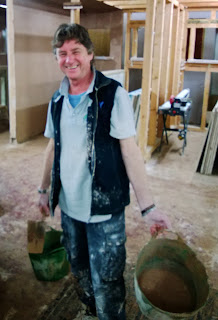
| Len the tutor |
One other thing to say; I had a really good chat through the course with Len who has renovated a number of houses in france and was very interested in my plans for the school. Fingers crossed we'll stay in touch and he can come out and see what I am doing.
 |
| I got SOME on the walls |
Cheers Len.


Now if you got len to run his courses in Bulgaria...you could get it done for free ..just a thought...
ReplyDeleteMud, glorious mud!
ReplyDelete