Over the weekend I had a day with Julian for a couple of different reasons.
First of all I was meeting the Camper Van engineer to explain to him what I needed to have done regarding the electrics. This went quite smoothly and he is off to source the parts and will come in the next couple of weeks to do the work.
After this my friend from twitter came over and we set to work to remove the fridge.
 |
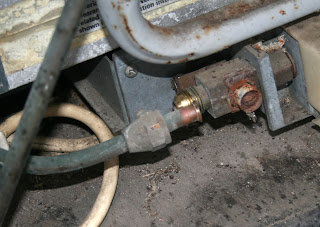
| Detached the pipework |
Contrary to previous advice the pipework was all copper, which makes a lot more sense than steel, and so out came the american size wrench and within thirty seconds the fridge was disconnected from the gas.
 |
| Hacksawing |
As an aside we also found the isolation valve for the fridge, it's the screw just to the right of where the pipe is no detached. It does make me wonder whether the fridge would have worked but I don't really want one so it's not the end of the world really.
 |
| Pinched and bent |
With the fridge disconnected and confidence that no gas was going to leak my friend cut off the pipe with a hacksaw and then pinched the end off having stuffed it with
petroleum jelly flux to assist the soldering process which was next.
 |
| Soldering |
My friend brought out his blow torch and a very thick spool of solder; this is not the solder you would use to add a transistor to a circuit board.
 |
| More pinching and bending |
Another pinching and bending and another blast with blow torch and solder and we had a gas pipe that was sealed off and (according to our noses at least) not leaking anything.
 |
| Sealed pipe |
So the complicated part of the process was completed, now all we had to do was remove the actual unit from its space. That'd be easy, right.
Wrong.
First we had to remove the bracket attaching it to the floor of the camper and then it did slide out quite easily. However it was too large to go out through the door.
 |
| Removing stuff to make it smaller |
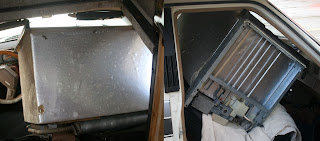
Oh well, no trouble, I thought, we'll just go out through the front passenger door as I can take the bed apart and drop it down on the seat and out.
 |
| Wedged in the front passenger seat |
Unfortunately it was about 10mm too wide and this failed also.
 |
| Hacksawing the coolant system off |
Being blokes we then did the only thing we knew to do; attacked it with a screwdriver and a hack saw, removing any and all bits until it was small enough to fit out of the door. The coolant was VERY nasty and I almost threw up. We literally threw it out of the door and escaped gasping into the fresh air.
And we had won!
 |
| The bleeding fridge |
 |
| And the removed bits |
We had defeated the evil fridge which now say, bleeding and in pieces, and ready for scrap.
Thanks to battsby for all your help; you are a gentleman and a scholar.
Now I have to build the rabbit hutch in the space; at the moment the camper is insecure as the access hatch where the fridge used to be does not lock, and is flimsy plastic. I am quite looking forward to sorting this out, though, and looking at it Sassy is going to be a very lucky rabbit, as there is actually quite a lot of room there.


That 'petroleum jelly' was flux! (I have no idea WHAT you were imagining when you wrote that!
ReplyDeleteBut they do say, don't knock it until you've tried it! :o)
Whooops!!
DeleteHAHA
*corrected*
I just guessed ;) it looked a bit jelly like, and it burned with a COOL colour :)